Pages

Showing posts with label baking. Show all posts

Thursday, 18 June 2015

Vegemite Chocolate Brownies


Are you a fan of trying strange or unexpected food combinations? I'd like to think that I'm fairly adventurous, particularly if chocolate is involved!

I'm sure you've all seen the new Cadbury's Vegemite Dairy Milk chocolate. I think the idea is that the saltiness of the Vegemite should go well with chocolate, in the same way that sea salt and chocolate are a good match.


Initially I thought that the Vegemite would either be a thick paste in the middle of the chocolate, or that perhaps there would be Vegemite flavoured chips throughout the chocolate. In fact, the Vegemite comes as a Vegemite-flavoured caramel in the centre of each square. The caramel itself is a dark brown colour and smells quite strongly of Vegemite.


The best way to eat the chocolate is to put a whole square in your mouth at once and chew. This way, the caramel mixes with the chocolate and becomes a background savoury type flavour. You don't even really taste the Vegemite per se, but rather it adds an extra richness to the chocolate. Be careful though and don't do what I did the first time which was to eat the caramel on its own - it's quite strong and even a bit overpowering!

Anyway, it wasn't too bad overall, although I probably wouldn't eat more than a couple of squares at once, mostly because the richness becomes all a bit too much. I felt that having something to act as a foil to the strongly flavoured chocolate was what was needed. Something thick and cakey like a brownie to act as a cushioning for the bursts of flavour.


I decided to go with a more plain cakey textured brownie rather than my usually fudgey brownie, as I thought this would go better with the richly flavoured chocolate. The recipe itself was pleasantly simple and quick, which I very much appreciated!
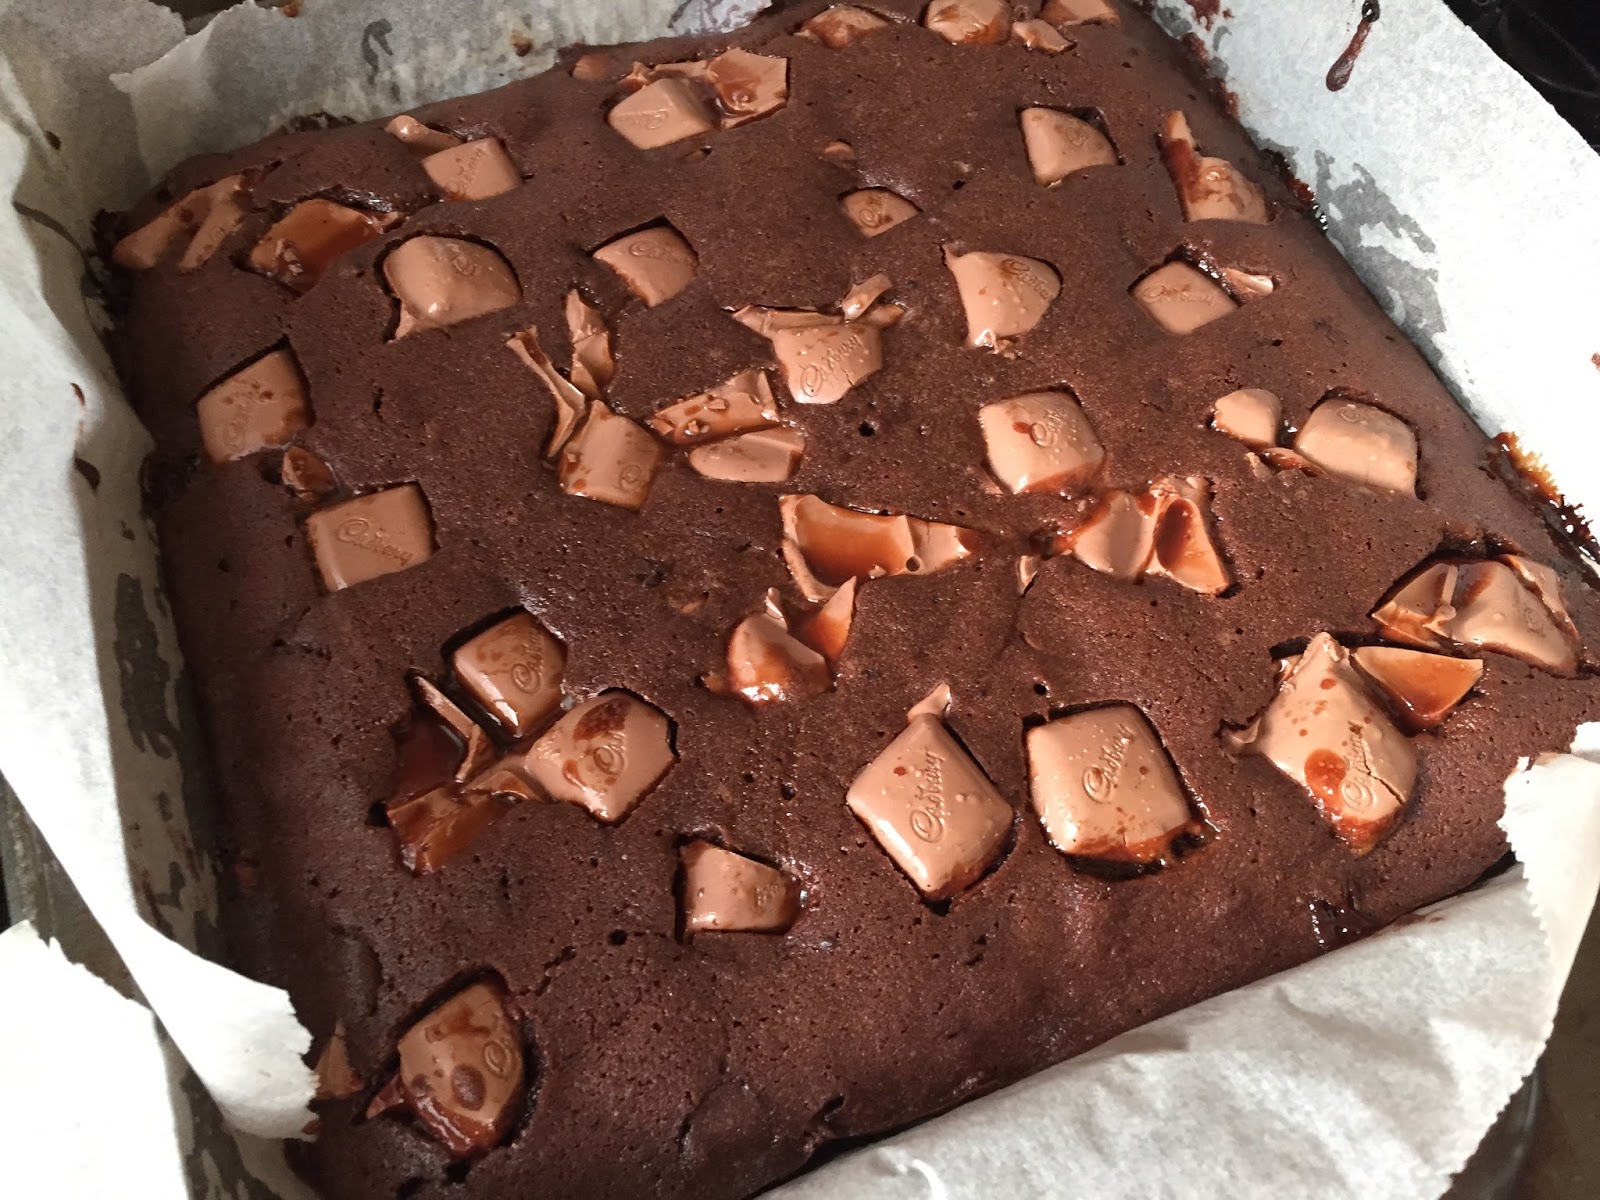


The combination of the simple brownies and Vegemite chocolate was surprisingly good! The brownie mixture really did help to take the edge off the chocolate, resulting in a much more palatable sweet. In fact, some of my taste testers did not even know that it was Vegemite! As usual, Mr Duckie polished these off, eating six pieces in one go!


So, why not add some Vegemite to your usual brownie repertoire - you may be surprised at how much you like them!


Vegemite Chocolate Brownies

Adapted from taste.com.au

250g butter
1 cup caster sugar
1/2 cup brown sugar
4 eggs
1 1/2 cups plain flour
3/4 cup cocoa
1 tsp vanilla essence
1/2 x 250g block of Cadbury's Vegemite Chocolate (or more if you dare!), chopped into squares

1. Preheat oven to 180 degrees. Line a 20cm x 20cm square pan with non-stick baking paper.
2. Melt butter in a saucepan over medium heat. Remove from heat. Stir in sugars. Add eggs one at a time and stir until mixture is thick and glossy.
3. Sift the flour and cocoa over the egg mixture and stir until well combined. Stir in vanilla. Spread into prepared pan. Top with Vegemite chocolate squares.
4. Bake for 30 minutes or until a skewer inserted into the centre comes out clean. Set aside to cool in pan completely. Cut into pieces and serve.


Thursday, 9 April 2015

Chocolate Caramel Easter Cake


Hello there! Hope you all had a great Easter break! Easter celebrations here in the Duckie household were, naturally, happily full of food!

Easter marks the end of Lent and the end of Lenten fasting. Which for us means celebrating with meat and chocolate!

To mark this special occasion, I got up early on Saturday morning to prepare an Easter chocolate cake for our Easter feast that night. In the weeks leading up to Easter, I began my search for the perfect chocolate celebration cake. I eventually found a very yummy salted caramel chocolate cake recipe and when I saw it I knew that was going to be the one! I carefully prepared for the cake-making by doing a thorough search of my local supermarkets to find suitable Easter-themed chocolate items for decoration (and eating!).

Caramel oozing everywhere, creating a sticky mess!
Salted caramel, whilst being totally delicious, also always turns out to be extremely messy for me! This was only my second time dealing with caramel, but again I found that it managed to go absolutely everywhere! I filled the cake with the caramel mixture but somehow mine did not look thick and gooey like the one in the picture, but more saucy and runny. I realised the next day when I took out my caramel from the refrigerator that it wasn't chilled enough - so if yours is too runny make sure to put it in the fridge for a bit! Anyway, half an hour later, I found all the filling had oozed out! So we ended up putting the caramel on top of the cake as a sauce. I think I may have also overcooked the cake slightly but luckily no one else seemed to mind!

Here are some more pictures of the festivities! First, some mini beef burgers:


Some pigs in blankets (sensing a miniature foods theme here?)


And finally I had also prepared some cherry chocolate truffles the night before, but we were so full that these were barely touched! They did taste very nice the next day though ;)


Hope you've all had your share of yummy Easter chocolates and feasts too! I'm off to work my way through the rest of my Easter chocolate stash ;)


Chocolate Caramel Easter Cake


Recipe adapted from BBC Good Food

115g salted butter, plus extra for greasing
225g dark chocolate (70% cocoa)
150ml milk
225g light brown sugar
2 tsp vanilla extract
2 large eggs separated
150ml sour cream
200g self-raising flour
2 tbsp cocoa powder
1 tsp baking powder
1 tbsp sea salt crystals
Chocolate bunnies and eggs, to decorate

For the caramel
450g caster sugar
2 tbsp golden syrup
115g salted butter
125ml thickened cream
2 tbsp sour cream

For the chocolate ganache
225g dark chocolate (70% cocoa)
250ml thickened cream
Dessertspoon sea salt crystals (or to taste)

1. First, make the caramel. Pour 100ml water into a large saucepan. Add the sugar and golden syrup, gently cook until melted, then turn up the heat a bit and cook until the caramel is a dark golden brown colour. Swirl the pan occasionally to prevent sticking but to not stir (add a few drops of lemon juice if any big crystals are forming). Turn off the heat and carefully whisk in the butter, cream, and sour cream - it will bubble up quite high. Whisk until smooth, then leave to cool slightly set (you may need to put the caramel in the fridge for a bit to make it thicken up). You can make this up to 3 days in advance and chill in the fridge - just gently reheat until soft enough to spread before assembling the cake.
2. For the cake, heat oven to 180 degrees. Grease a 23cm springform cake tin and line the base with baking parchment. Melt the chocolate, butter and milk in a large pan over low heat, stirring until smooth. Remove from heat, then beat in sugar and vanilla. Cool slightly.
3. Beat egg yolks and sour cream together, then mix into chocolate mixture, followed by the flour and baking powder.
4. Whisk egg whites in a clean bowl until stiff peaks form. Stir a third of the egg whites into the cake mix, then gently fold in the rest along with the sea salt.
5. Pour into the prepared tin and bake for 40-50 mins until firm to touch. Leave to cool for 20 mins, then remove from tin and finish cooling on a wire rack.
6. For ganache: heat chocolate and cream together over a low heat until chocolate has melted. Pour into a bowl to cool.
7. To assemble: slice cooled cake in half horizontally. Sandwich together with some of your caramel - you may not need it all, but be generous in order to balance the bittersweet ganache topping. Spread ganache over the top of the cake and sprinkle with some sea salt crystals if you like. Decorate with bunnies and eggs.

Cherry Chocolate Truffles


Recipe adapted from taste.com.au

200g dark chocolate, chopped
1/3 cup thickened cream
2 tbsp brandy
20 glace cherries
1/4 cup cocoa powder

1. Combine chocolate and cream in a heatproof, microwave-safe bowl. Microwave, uncovered on medium (50%) for 2-3 minutes, stirring every minute with a metal spoon, or until melted and smooth. Stir in brandy. Cover. Refrigerate for 3-4 hours or until firm.
2. Line a baking tray or plate with baking paper. Using 1 teaspoon of chocolate mixture at a time, roll into balls.
3. Flatten balls using palm of hand. Wrap discs around cherries and form into a ball. Place cocoa into a shallow dish. Roll balls in cocoa to coat. Place on prepared tray or plate. Refrigerate until firm.

Monday, 19 January 2015

Vegan raspberry and coconut cheesecake


These days there is a growing appreciation and understanding of vegetarian and vegan diets. I'm sure that many of you have friends or family that follow these diets, whether full-time or perhaps on selected days, for religious, ethical, or environmental reasons. So, for the last course in my four-course menu assignment, I decided to make a vegan-friendly dessert. As an extra challenge, I decided to take on a dessert that relies heavily on non-vegan ingredients, namely, the cheesecake! My aim was to modify an existing cheesecake recipe so that it could satisfy special dietary requirements (in this case I managed to make the cheesecake both vegan and suitable for lactose intolerant individuals) without sacrificing on flavour!

My first adjustment was to use tofu as a replacement for cream cheese – tofu is rather firm and creamy, like cream cheese, and from afar they even look similar! Tofu is also a good source of protein, and so adds another health benefit to those who are vegetarian. It is important to use the right texture of tofu though. For this recipe I used a high-protein tofu which was far too firm, and so the mixture ended up being a bit grainy (as you may be able to see in the picture), as well as a slightly yellow colour and a bit too strong in tofu flavour. I think a regular firm or a silken firm tofu would work far better.


The other big replacement I made was to use coconut cream instead of dairy cream. I found quite a few online tutorials showing me how coconut cream can miraculously be whipped just like regular cream! First, you need to use a coconut cream that does not contain any thickeners or stabilisers, as these prevent the cream part from separating from the liquid. Second, the cream needs to be cold, so put your can in the fridge overnight, or in the freezer for 10 minutes. This also helps the fat to separate from the liquid. Finally, you only want the cream part of the coconut cream, so scoop this off the top of the can and leave behind the liquid. This is the part that is nice and thick, and what will make your coconut cream whip up.

Finally, I replaced the gelatine in the original recipe with cornflour. However, I'm not sure this step was necessary as the mixture had a bit of floury after-taste. So I think I need to experiment with this some more!


I tested this recipe on Mr Duckie's family, who normally won’t go anywhere near tofu! So how did it go? Well, funnily enough, when I had a small taste test of the filling, I thought that it tasted awful! I even felt sick thinking about it! Unfortunately, I didn't have enough tofu to try again, so, with a heavy heart, I served up my cheesecake with lots of caveats and warnings.

However, I shouldn't have worried, because everyone else seemed to love it! The cream part itself was very mild and most people did not pick that it contained tofu. My mother in law said that it was nice and light, not too sweet, and a good way to end a heavy meal. A visiting uncle (who inadvertently also turned into a test guinea pig) said “pretty good for a healthy dessert, although I still prefer regular cheesecake”. Even Mr Duckie, who normally wouldn’t poke tofu with a stick, decided that it was “not too bad” and went back for another serve.  Now I thought that everyone was just being nice to me, but, the cake was finished by the end of the day! 


Apparently, I managed turned a family of tofu-haters into tofu-lovers, so I think it is definitely worth giving this recipe a shot, regardless of whether you are a vegan or carnivore! It was also a very fun process to modify a recipe to suit different dietary needs, so I definitely encourage some kitchen experimenting with different ingredients to suit your needs!

On a final note, I once again may disappear from this blog for a few weeks as I prepare to go on my first clinical placement in the Blue Mountains! I'm both excited and a bit nervous, but looking forward to learning a lot and developing my skills as a dietitian!


Vegan raspberry and coconut cheesecake


Serves 8

250g plain sweet biscuits
125g canola spread
3 tsp cornflour
1/4 cup hot water
500g firm tofu
100g caster sugar
300ml coconut cream, chilled, creamy part only (see note)
1-2 tsp rosewater (depending on how strong you prefer the flavour)
200g frozen raspberries
30g caster sugar, extra
Coconut flakes, to decorate

Method

Grease and line a 20cm-round springform pan. Process biscuits until mixture resembles fine breadcrumbs. Add canola spread and process to combine. Press mixture over base and side of prepared pan. Refrigerate for 20 minutes.

Combine cornflour and boiling water and stir to combine. Using an electric mixer, beat coconut cream until it becomes thick. In another bowl, beat tofu and sugar until smooth. Fold in coconut cream, cornflour mixture, and rosewater. Pour into prepared pan. Cover, refrigerate overnight.

Combine raspberries and extra caster sugar in a small saucepan. Heat over low heat to form a sauce. Set aside to cool.

Remove cheesecake from pan and transfer to a plate. Cover with raspberry sauce and coconut flakes to decorate. Serve.

Note: for coconut cream, start with chilled coconut cream - either put the tin in the fridge the night before, or in the freezer for 10 minutes (be careful not to keep in the freezer for too long). Remove tin from fridge/freezer and open tin. Scoop out the top, thick creamy part only, leaving the liquid behind in the tin.


Original cheesecake recipe (for comparison against modified recipe)

Recipe taken from taste.com.au

250g plain sweet biscuits
125g butter, melted
3 tsp gelatine powder 
¼ cup boiling water
500g cream cheese
1/2 cup caster sugar
300ml thickened cream, whipped
1 tsp vanilla bean paste
300g fresh or frozen blueberries
Icing sugar mixture, to serve

Method
Grease a 6cm-deep, 20cm-round (base) springform pan. Process biscuits until mixture resembles fine breadcrumbs. Add butter. Process until just combined. Press mixture over base and side of prepared pan. Refrigerate for 20 minutes or until firm.

Sprinkle gelatine over boiling water in a heatproof jug. Whisk with a fork until gelatine is dissolved. Set aside to cool for 15 minutes.

Using an electric mixer, beat cream cheese, sugar and vanilla until smooth. Gradually beat in gelatine mixture until combined. Fold in whipped cream, then 1 cup blueberries. Pour mixture into prepared pan. Smooth top with a spatula. Sprinkle remaining blueberries over cheesecake. Cover, refrigerate overnight.

Remove cheesecake from pan and transfer to a plate. Dust with icing sugar. Serve.

Tuesday, 11 November 2014

Pink zebra cake and life lessons


It's come to that time of the year again - exam time! And how time has flown by. It has been about three months since I last posted, but not because I haven't had anything to post about.

Somehow in August and September all the bad things seemed to happen at once, one after the other, in quick succession, with a fresh problem occurring just when one resolved. I'm sure that most regular people would be able to re-gather themselves quickly and move on. Unfortunately as I've come to realise over the years, I am rather more sensitive than the usual person, so whatever the situation is, good or bad, I seem to feel it more and take more time to recover back to a state of normalcy.

Now I am slowly coming to terms with the fact that there is not really such a thing as "normal" life, one where everything runs smoothly, everything's in order, and life events can be planned out carefully. But that is ok with me! In spite of the extremes, I don't think I would want life any other way. Accepting that normal can mean erratic bursts of chaos has helped me to be more happy with situations and people (including myself) even though there may be limitations and imperfections. And it pushes me to take more action in putting the balance, fun, and peace back into my life,  rather than just waiting for things to change.


Now onto some more light-hearted talk after all that reflection! As I mentioned, I have had a number of occasions in these past months which provided some good baking opportunities. One such occasion was my mother-in-law's birthday last month, and birthdays naturally means there must be birthday cake! However, with summer looming and concerns about losing that sneaky winter weight, I wanted to make a simple and light cake that would look impressive but that wouldn't take too much fuss. Luckily, as I was idly flipping through food magazines, I came across a recipe for chocolate zebra biscuits which triggered a distant memory of a zebra cake recipe I had read about ages ago. With some research and a few tweaks, I had the makings of a perfectly pretty birthday cake.

First, I decided to replace the chocolate with a pink batter, as I thought this would love more feminine and festive. Then, as a healthier (and easier) alternative to a full buttercream icing, I decided to top the cake with some dollops of light cream cheese and strawberries.

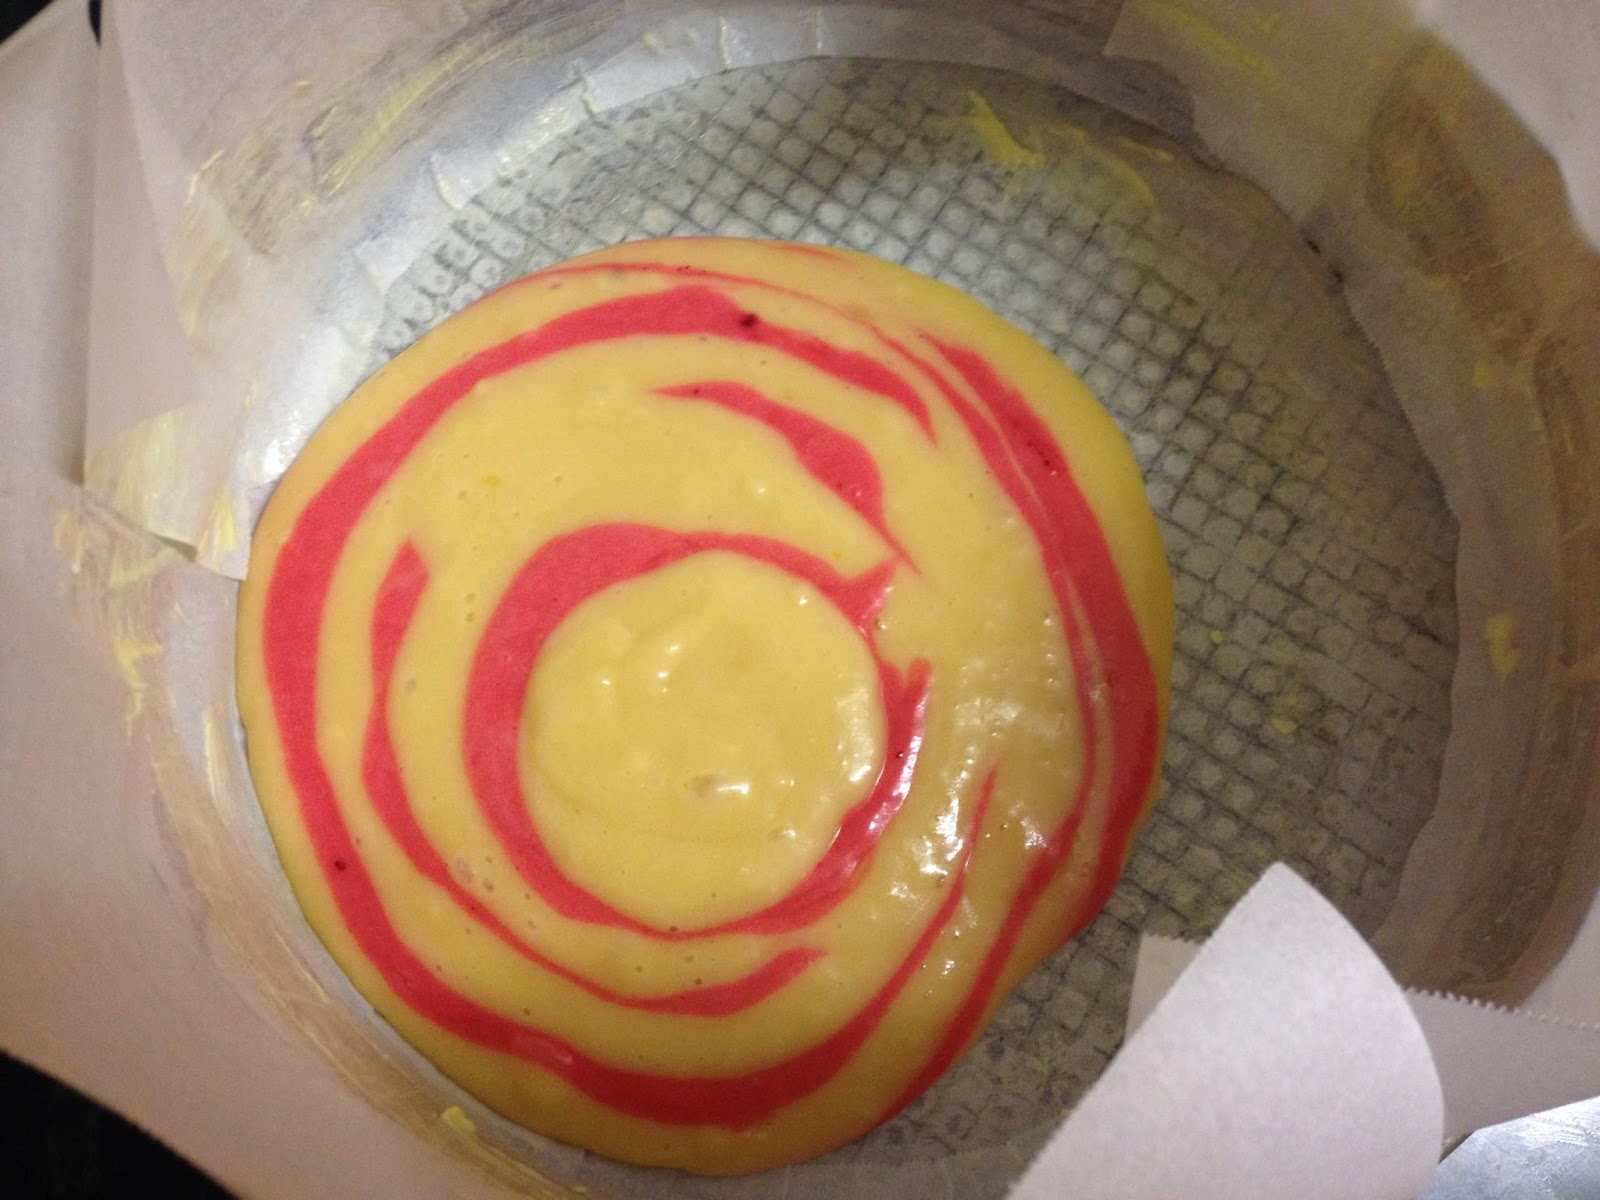
I was quite pleased with how easy it was to make. Basically you just have to put alternating spoonfuls of batter on top of each other. Normally when a recipe is described as being simple, I somehow find a way to get confused, and I really did not believe that such a simple method could create such perfect layers (at least not in my hands). 

My first tentative spoonfuls

But, to my joy and relief, I did achieve an orderly pink and white striped cake! The only problem I had was that my circles started to drift to one side as I poured the batter on!


My swirls drifting towards the left...

So what I did was to slowly drift my circles back in the other direction as I poured them on, which seemed to do the trick (although it did mean my cake no longer had a bullseye look, but more of a random swirls look).
Slightly off centre swirls...

Although the cake was simple, it was enjoyed by the whole family, particularly my mother-in-law! Whilst it tasted like a simple butter cake, the swirls of pink seemed to give it a special lift (I'm sure pink is a flavour!). I was also surprised at how nicely the little dollops of cream cheese went with the cake, adding a rich creaminess to the cake. And the batter uses oil instead of butter, again reducing the saturated fat and also making the batter super simple to prepare and work with.


So overall, it really has actually been a good few months - these "life lesson" times always seem to turn out that way, even though it feels like it's all too much at the time. Now I'm looking forward to finishing exams (only one more to go - yay!) and hopefully to sharing more of what I have been up to soon!

Happy Birthday!

Pink Zebra Cake


Adapted from Lorraine Pascale's Crounhing Tiger, Hidden Zebra cake, recipe from My Baba

Serves 8-10

Ingredients
250ml canola (or other flavourless) oil, plus extra for greasing
250g caster sugar
100ml reduced fat milk
4 medium eggs (at room temperature)
A few drops of vanilla extract
A few drops of pink food colouring
325g self-raising flour
1 tsp baking powder
220g extra light Philadelphia spreadable cream cheese
Icing sugar, to taste
Strawberries to decorate
Method:
Preheat the oven to 180°C. Grease the bottom of a 23 cm sandwich tin with a little oil and line with baking paper. Set aside on a large baking sheet.

Put the oil, sugar, milk, eggs and vanilla extract in a large bowl and whisk together to combine.
Pour out 400ml of this mixture  into a medium bowl.
Sift 175g of the self-raising flour into one bowl along with 1/2 teaspoon of the baking powder. Mix well and set aside. This is your vanilla mix.
Sift the remaining 150g of self-raising flour and 1/2 teaspoon of baking powder into another bowl. Add pink food colouring to achieve your desired pinkness and mix everything together well and set aside. This is your pink mix.
Put a tablespoon of the vanilla mix in the middle of the cake tin. Then, using a clean tablespoon, put a blob of the pink  mix in the middle of the vanilla one. Keep doing this, alternating between vanilla and pink, so you form a type of ‘bull’s eye’ or ‘target board’ look. Each time you dollop a blob in, the whole mix will spread out across the base (you may need to adjust where you put your blobs so that you get an even distribution of cake mix along the bottom). By the time you have used up both of the cake mixes, they should have just reached the edge of the tin (the pictures I looked at ended up with even concentric circles, looking like a bullseye, but don't worry if yours is not so geometrically accurate).
Bake in the oven for 35 minutes or until a skewer inserted into the centre comes out clean.
Remove from the oven and cool in the tin for 10 mins. Then remove cake from tin and cool completely on a wire rack. Decorate with strawberries and cream cheese then serve.
Check the cake is cooked by inserting a skewer into the centre. It should come out clean. If not, then return to the oven for another 5 minutes or so until cooked. Once cooked, remove from the oven and allow to cool for a few minutes in the tin. Then carefully remove from the tins and leave to cool completely on a wire rack.
Meanwhile, mix icing sugar into cream cheese to taste. Decorate cake with cream cheese and strawberries, then serve.

Saturday, 26 July 2014

Carrot, orange, and apple muffins


It has been a slightly topsy turvy couple of weeks! Poor Mr Duckie has been working strange hours - New York hours to be precise. New York is 14 hours behind Sydney, which has meant that Mr Duckie had to leave for work in the late afternoon/evening, come home in the early morning, sleep for a bit, wake up to do some more work, have another nap, then head off to work again!

This necessitated more flexible meal and snack plans, in particular, I wanted to give Mr Duckie something healthy and filling to take to work with him whilst he was up at work between "dinner" (now served at afternoon tea time) and "breakfast" (taking place at around morning tea/lunch).

Yes there are two muffins missing at the back - we were too eager to try them!

Luckily, I'd bought some oranges (and neither of us like eating oranges on their own that much), so combined with some other fruits, carrot, chia seeds, and wholemeal flour, I was able to whip up some yummy and goody filled muffins!

To bind the mixture together, I used mashed banana and chia seeds. Grated carrot and apple add some extra moisutre and sweetness (and some extra nutrients!). I also had to add a bit of milk as I felt the mixture was a bit stiff, but of course you could replace this with any non-dairy milk substitute of your choice.


One of the best things about this recipe is that your kitchen will smell great, thanks to all the orange! In fact, when Mr Duckie got home, he immediately said "Have you been cooking? What's in the oven? Something smells lemony!" (haha I suppose lemons and oranges do smell rather similar once cooked!). And then of course he got very excited and hopeful, as he has a nose for baked goods and is always optimistic for sweet treats!

In terms of the taste and texture, the muffins were actually very light and soft. The orange added a real citrus tang to the muffin, and the mixture of the other fruits and carrot helped to add some natural sweetness.


These muffins can be frozen and stored for later when work or school snacks are needed. I think the addition of your choice of dried fruits or nuts would also add an extra taste dimension!

Anyway, luckily the New York hours are over and the both of us are now back on Sydney time! Hooray! Time to sleep it all off and return to normal! :)


Carrot, orange, and apple muffins

Adapted from Coles Recipes & Cooking

Makes 12

Ingredients

1 1/2 cups wholemeal plain flour
1/2 cup cornflour
4 tsp baking powder
1 tsp cinnamon
Pinch of salt
1 large carrot, grated
1 granny smith apple, grated
1 medium banana, mashed
1 orange
1 tbsp chia seeds
1/2 cup canola oil
1/4 cup milk or milk alternative (e.g. soy milk)

1. Preheat oven to 200 degrees (180 fan forced). Line 12 1/3 cup capacity muffin pan with paper cases
2. Mix chia seeds with 1/3 cup water in a small bowl. Set aside for 10 minutes until chia seeds swell up and form a thick gel.
3. In a large bowl, sift in wholemeal flour, cornflour, baking powder, cinnamon and salt. Zest orange rind over the top
4. Remove pith from orange and cut into small pieces. Place orange and any juice that came from cutting up the orange into a small bowl. Add carrot, apple, banana, oil, milk and chia seeds. Stir to combine.
5. Pour wet ingredients into flour mixture and stir gently until just combined.
6. Spoon mixture evenly among prepared muffin pan cases and bake in oven for 20 minutes or until cooked through. Cool in tin for 10 minutes, then remove from tin and enjoy!

Monday, 14 July 2014

Chocolate and salted caramel cupcakes


Recently Mr Duckie and I celebrated our "dating" anniversary (hehe that sounds so daggy!). We have been together for 8 years now! The years have definitely flown by what with all the busy-ness that life is full of, and I am so glad to have had someone special to share all these experiences with :)

Every year for Mr Duckie's anniversary present, I like to follow the "traditional" anniversary gift ideas (e.g. first year is paper, second year is cotton, and so on). I know these are meant to be wedding anniversary gifts, but it still helps me to come up with some meaningful!

So, a quick check of Wikpedia told me that for the 8th year, the traditional US gift is bronze, and the traditional UK gift is salt. This left me pondering for a while. I wasn't sure that a jar of salt was quite an appropriate present, and I wasn't sure I could do much with bronze either!

And then I thought, of course! I should bake something with a bronze and salt theme! And then I realised - yes, salted caramel! It covers both the salt and bronze components (caramel is kind of a bronze colour, right? At least that's what I told myself). And in any case, salted caramel is so tasty, who would be upset with receiving it as a gift?

Please excuse the messy piping, I am definitely still learning my piping skills!

I decided to use a chocolate cupcake as a base for the caramel, as I wanted something that would be strong enough to stand against the sweetness and richness of the caramel. The cupcakes themselves were quite easy to make and had just the right amount of chocolatey-ness.

However, the caramel part turned out to be quite messy! I somehow managed to dribble lots of sticky caramel all over the kitchen bench, down the side of the kitchen drawers, and onto the floor. I think I flung little droplets of caramel into another part of the kitchen as well. And of course, whilst making the icing I managed to cover all the benches in a fine dusting of icing sugar.

I should also warn you to be careful when mixing the caramel - take care not to splash it on yourself as it will burn! I was rather too vigorous whilst stirring the caramel (I got a little scared when I added the cream to the melted sugar as it started fizzling so much!), so I ended up with a couple of sugar burns on my forearm.

But it was all worth it!


Overall, this was a very rich and sweet cupcake. Mr Duckie was very pleased when he saw the cupcakes, and quickly downed one in a few bites. However, much to his dismay, he couldn't manage a second one! I also had a huge sugar rush after eating one of these cupcakes. So do make sure to have a cup of tea on standby to wash all the sugar down!

I also had lots of caramel sauce left over, so I served it on the side (although as I said, this is a very rich cupcake, so go easy with the extra sauce!). I think it would also go nicely on top of some ice-cream, or perhaps to jazz up some plain cakes with!

This is definitely a special occasion only recipe, but I'm sure that whoever you make these for will appreciate you for it :)


Chocolate and salted caramel cupcakes

Makes 12

Ingredients

Chocolate cupcakes
From "Crave" by Maureen McKeon

185g unsalted butter, at room temperature
235g (1 cup) caster sugar
100g dark chocolate, melted
2 large eggs, beaten
185g (1 1/2 cups) plain flour
2 tsp baking powder
1 tbsp cocoa powder
125-185ml (1/2-3/4 cup) milk

Salted caramel sauce
Adapted from Love Swah

1 cup caster sugar
1/2 cup water
3/4 cup thickened cream
1-2 tsp salt (or to taste)

Salted caramel butter cream
Adapted from Love Swah
110 g butter, softened
3 cups icing sugar mixture
1/2 of the salted caramel sauce

For the cupcakes:

1. Preheat the over to 180 degrees. Line a standard muffin tin with paper cases
2. Cream the butter and sugar until pale and fluffy. Beat in the cooled melted chocolate. Add the beaten egg and beat until smooth
3. Sift the flour, baking powder, and cocoa together. Fold the dry ingredients into the chocolate mixture in two additions, alternating with the milk. Use 125ml (1/2 cup) of the milk to start with, adding more if necessary to give a light mixture.
4. Divide the mixture among the paper cases, filling each about three-quarters full. Bake for 18-20 minutes, or until well risen and cooked.
5. Cool for 10 minutes in the tin, then remove and transfer to a wire rack.

For the salted caramel sauce:

1. Combine sugar and water in a heavy bottomed saucepan and stir to dissolve. Heat over a medium heat until bubbling.
2. Bubble mixture for 5-10 minutes without stirring, until a deep golden colour is reached. Keep a close eye on the mixture as you do not want to burn the sugar.
3. Take mixture off the heat and carefully stir in cream (I found using a wooden spoon is best). Be careful as the mixture will bubble when the cream is added. Don't worry too much if some sugar lumps form, this happened to me, and I just ended up taking a big lump of hardened sugar mixture out.
4. Stir in the salt to taste. Pour mixture into a bowl and place into fridge to cool.

For the frosting:

1. Beat butter and icing sugar in a large bowl for about 5 minutes or until light and fluffy.
2. Add caramel sauce and beat to combine. Taste and add more caramel if necessary.

To finish:
1. Pipe icing onto cooled cupcakes. Drizzle over some of the remaining salted caramel sauce to decorate.


Saturday, 26 April 2014

Easter coconut and chocolate tart


Hi everyone! Hope you all had a fantastic Easter break last weekend! Luckily for me, I also had the week off from uni, although somehow, what with all the errands and catching up on study and assignments, it went by incredibly quickly. 

This year (like every year!) Easter was celebrated with much feasting and indulgence.  Mr Duckie and I were particularly looking forward to eating meat and chocolate again! I'd had chocolate on my mind for weeks, as I was thinking and researching ideas for what chocolate dessert would be best to celebrate with. My mind first turned to some chocolate mousse and cream type cakes, and the recipes I saw did look incredibly delicious. However, as the years pass, Mr Duckie and I find that our digestion is not as strong as it used to be (sigh...old age...), and I wasn't sure how our stomachs would cope with the sudden onslaught of indulgence.

Then my mum brought home an old magazine from her work. It was a health focused magazine, and best of all had a "Guilt-free Desserts" section showcasing vegan desserts! There were pages and pages of sumptuous looking desserts, and from these recipes I chose this delectable chocolate tart. Ingeniously, instead of cream, coconut cream is used to make the chocolate filling, and the butter in the tart shell is replaced with coconut oil. This was the perfect recipe as I already had most of the ingredients at hand, and with all the non-dairy substitutions, I hoped it would be a little easier on the tummy!


And indeed this tart did not disappoint. Even though the filling was dairy-free, it was so very creamy, velvety and rich. In fact, my mum and my mother-in-law both thought I had used cream cheese to make the filling! The filling tasted intensely chocolately, whilst the crust had a mild coconut aroma and taste. The original recipe used ground hazelnuts for the crust, however, I replaced these with plain sweet biscuits so that Anita could eat it. I think it would taste quite nice though with hazelnuts -perhaps even a half-and-half mixture of nuts and biscuits would be good!


Overall, it was a satisfyingly delicious chocolate dessert, without all the usual heaviness! I decorated the top with Easter eggs, but of course you could use berries or your favourite fruit instead, or just enjoy it as is!

Coconut and chocolate tart

Adapted from Nourish magazine, July-August 2013, p 82.

Ingredients

220g plain sweet biscuits (I used Shredded Wheatmeal biscuits - which I subsequently discovered are quite tasty on their own or with a cup of tea!)
30g shredded coconut
40g cocoa powder
2 tbsp honey
3 tbsp coconut oil
1 can (400ml) full-fat coconut cream
280g 85% dark chocolate, broken
Easter eggs, fresh berries or fresh fruit, to decorate

1. Preheat oven to 180 degrees.
2. Lightly grease a 20cm round springform tin with coconut oil. Line the base with baking paper.
3. Crush sweet biscuits into a fine powder - you can do this in a food processor, or put the biscuits into a zip-lock bag and crush with a rolling pin (lots of fun!). Place the crushed biscuits into a bowl, then add coconut, cocoa powder, honey, and coconut oil. Stir to combine


4. Press mixture into tin and bake for 10 minutes. Set aside to cool completely.


5. In a small saucepan, bring the coconut cream to a gentle simmer. Remove from heat and add broken chocolate. Stir continuously until smooth and velvety and pour into tart crust.


6. Refrigerate for two to three hours, then top with desired decorations and serve.


Wednesday, 16 April 2014

Chewy fig and coconut cookies


As I may have mentioned before, Mr Duckie often travels for work. He has flown with quite a few different airlines, but this week was his first time on Virgin Australia. We caught up with an old uni friend on the weekend (also a frequent flyer) who told us about his experiences flying on Virgin, including how they were now giving out a complimentary snack on the flight. Mr Duckie looked puzzled. "Don't they normally give food?" he asked. When we explained to Mr Duckie that in fact, there was no in-flight meal, he looked horrified. "But what am I going to do for food!" he cried.


Luckily I had already planned to make these cookies. I have been rather intrigued by the coconut oil phenomenon for quite some time now. We even had a small discussion in class about whether coconut oil is in fact healthy! The main concern surrounding coconut oil is that it is high in saturated fat - in fact, according to the label on my jar of coconut oil, it contains 93.5% saturated fat. According to the Australian Dietary Guidelines 2013, saturated fats are linked with an increased risk of cardiovascular disease, and as such should be limited. However, proponents of coconut oil argue that most of the saturated fat in coconut oil is in the form of lauric acid, which is a a medium-chain fatty acid. It is claimed that lauric acid can improve blood cholesterol, assist in weight loss, and has antibacterial  and antiviral properties. Coconut oil is also promoted as a useful moisturiser for skin and hair.

At the moment, it appears that more research needs to be done in order to clarify and confirm the benefits of coconut oil, especially given that there is such strong evidence on the need to limit saturated fats. Whilst I would be happy to use it as a moisturiser (in fact, I did try some on my hands and it smelt very nice!) I don't think I'd start using coconut oil as a replacement for olive oil or canola oil.


In any case, I was very curious to find out whether coconut oil did in fact smell and taste of coconut. I was not disappointed! As I opened the jar, I got a waft of fragrant coconut. I then tried tasting some of the oil on its own (as I saw a well-known celebrity chef do on TV - although I only had a tiny dab of oil, rather than a whole spoonful!), and I found that the coconut oil had a pleasant, mild coconut flavour and smooth texture.

A spoonful of coconut oil straight from the jar

These coconut cookies are doubly coconutty from the combination of the coconut oil and the shredded coconut. Luckily for me, there was a special on figs at the supermarket, so I was able to add them into my cookies. I think you could easily replace this with dried figs or any other dried fruit of your choice.


Yay fresh figs!

My kitchen was filled with a delicious coconut aroma as these cookies were baking, which helped to cheer up a dreary, rainy morning. These cookies were also very easy to make - I pretty much just mixed everything in one bowl, then dolloped the dough onto trays! The cookies were crisp on the edges and soft in the middle whilst warm (I couldn't resist trying them straight away!), and they became more chewy once they had cooled. The diced figs also provided bursts of flavour and softness throughout.

So, although I am not yet convinced of the health benefits of coconut oil, I do have to say that the coconut oil was the winning ingredient in this recipe, as it added a distinct coconut flavour to the cookies!


Just a note: don't put your coconut oil in the fridge like I did, as it will go very hard and it will be very difficult to spoon it out of the jar! If you do find your coconut oil is too hard, try putting it into a bowl of hot water and this will soften and liquefy the oil and hopefully let you spoon it out!

Chewy fig and coconut cookies

Adapted from allrecipes.com

Ingredients

1 cup plain flour
1/2 tsp baking powder
1/2 tsp salt
1/2 cup coconut oil
1/2 cup raw sugar
1/4 cup caster sugar
1 egg
1 tsp vanilla extract
1 1/3 cup shredded coconut
2 figs, diced

1. Preheat oven to 180 degrees. Line two baking trays. Combine flour, baking powder and salt in a bowl and set aside.
2. In a medium bowl, beat coconut oil, raw sugar and caster sugar until combined. Beat in egg and vanilla until fully combined. Sift over the flour mixture, add shredded coconut and mix to combine. Stir in diced figs.


3. Drop teaspoonfus of dough onto prepared trays. Bake for 15-20 min or until golden. 


4. Leave on trays for 5 min then cool on wire racks.


Makes approx. 24 cookies

Monday, 10 March 2014

New Beginnings: Healthy banana oat bars


Last week I started back at uni again! After three long years studying undergraduate science, I have now finally made it to the Masters in Nutrition and Dietetics. I have been looking forward to this for so long - the whole of my bachelors degree was geared towards meeting the requirements for this Masters, and during those years, when people found out I was studying to be a dietitian, I would inevitably be asked for some nutrition advice. Unfortunately I didn't have enough nutrition knowledge to say much useful, but hopefully now I will be able to give some better advice!

The first week was certainly busy. It was quite intense with learning new material and with getting used to longer class hours (unlike the relatively more laid-back undergraduate lifestyle!), but it was also very interesting, especially as there is quite a practically-oriented approach to much of the coursework, including learning professional skills such as group education and counselling. We are also very lucky as we are some of the first students to use a newly built building in our university - it was only completed in December last year and it is very modern and comfortable!


Last week also marked the start of Lent, a period of penance and prayer in preparation for Easter. I always think that Lent is a beautiful time of year, as it guides us to reflect on our lives, identify areas for change and growth, and to be thankful for all our blessings. Lent is also a time of fasting or "giving up" certain luxuries. Every year, Mr Duckie and I give up meat and chocolate - Mr Duckie loves meat and I love chocolate, so we give up both in support of each other - so expect to see more vegetarian recipes coming up soon.


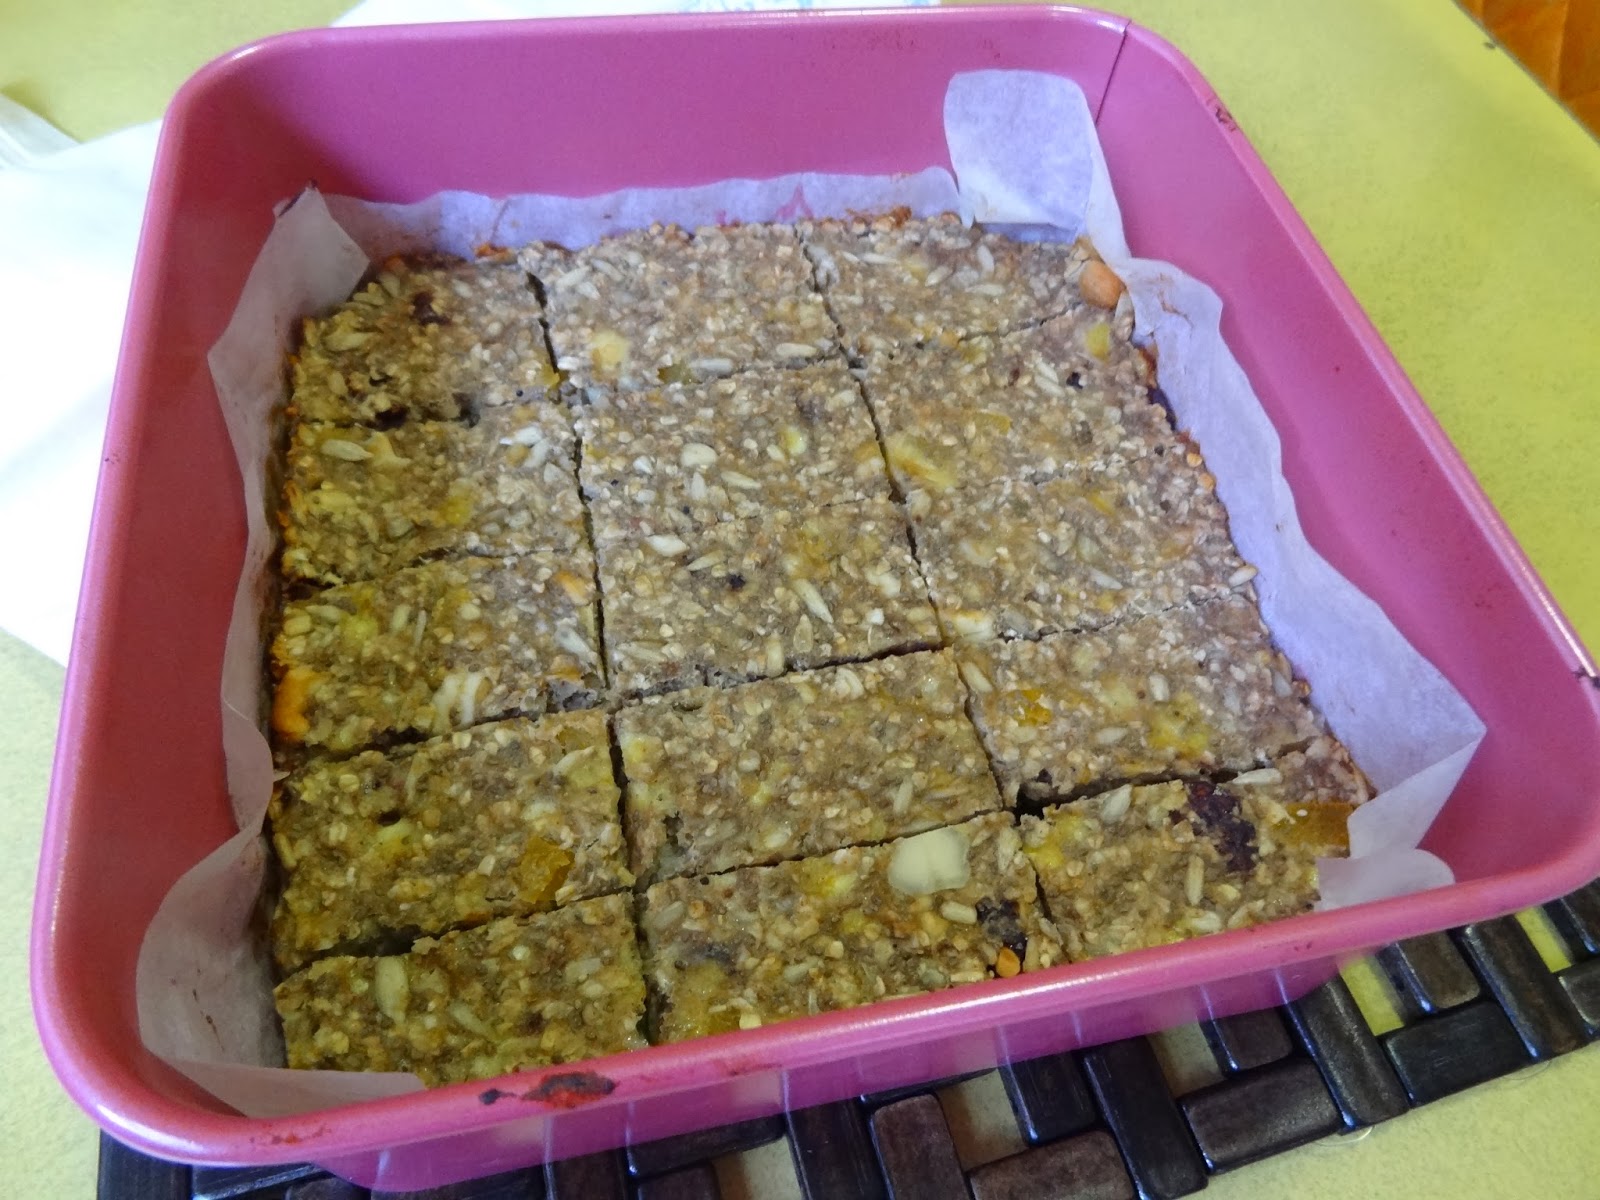
These bars are a perfect choice for taking to school (or work, or wherever you need to go) and are a great chocolate alternative when an energy boost is needed. They are very easy, and I dare say fun, to make, and the sweet fragrance of banana that fills the air during baking is sure to lift your mood. Best of all, the ingredients are held together by mashed banana, so there is no need for butter or sugar.

The bars are chewy and naturally sweet from the banana and dried fruits, and the nuts and seeds provide a satisfying warm crunch. This recipe works with whatever nuts, seeds and dried fruits you like - in particular, if you have a nut allergy, feel free to replace these with some more seeds or fruits. These bars can also can be frozen, so you can keep a handy store for any last minute snack emergency (I have also reheated these bars in the microwave and eaten them warm for breakfast)!

I hope that all has been well in your busy lives too and that you all have a great week! I am looking forward to trying out some more vegetarian recipes and hope to post these up soon too!


Healthy banana oat bars

Adapted from recipes from Eat Your Greens and taste.com.au 

1/4 cup finely chopped apricots
1/4 cup dried cranberries
1/2 cup sunflower seeds
1/4 cup chia seeds
1/2 cup nuts, roughly chopped
4 medium bananas, mashed (about 2 cups mashed)
1 cup porridge oats
1/2 tsp cinnamon
1/2 tsp salt

1. Grease and line a 22cm square tin. Preheat oven to 180 degrees.
2. Mix together the dried fruits, seeds, nuts and oats in a bowl. Mix in the mashed banana, cinnamon and salt. Pour into prepared tin and flatten surface with the back of a spoon.
3. Bake for 30 minutes or until top is firm and edges are golden brown. Cool in tin for 5 minutes then turn onto a rack to fully cool. Slice into bars in the size that you prefer (I made 18 smallish bars).