Pages

Tuesday, 11 November 2014

Pink zebra cake and life lessons


It's come to that time of the year again - exam time! And how time has flown by. It has been about three months since I last posted, but not because I haven't had anything to post about.

Somehow in August and September all the bad things seemed to happen at once, one after the other, in quick succession, with a fresh problem occurring just when one resolved. I'm sure that most regular people would be able to re-gather themselves quickly and move on. Unfortunately as I've come to realise over the years, I am rather more sensitive than the usual person, so whatever the situation is, good or bad, I seem to feel it more and take more time to recover back to a state of normalcy.

Now I am slowly coming to terms with the fact that there is not really such a thing as "normal" life, one where everything runs smoothly, everything's in order, and life events can be planned out carefully. But that is ok with me! In spite of the extremes, I don't think I would want life any other way. Accepting that normal can mean erratic bursts of chaos has helped me to be more happy with situations and people (including myself) even though there may be limitations and imperfections. And it pushes me to take more action in putting the balance, fun, and peace back into my life,  rather than just waiting for things to change.


Now onto some more light-hearted talk after all that reflection! As I mentioned, I have had a number of occasions in these past months which provided some good baking opportunities. One such occasion was my mother-in-law's birthday last month, and birthdays naturally means there must be birthday cake! However, with summer looming and concerns about losing that sneaky winter weight, I wanted to make a simple and light cake that would look impressive but that wouldn't take too much fuss. Luckily, as I was idly flipping through food magazines, I came across a recipe for chocolate zebra biscuits which triggered a distant memory of a zebra cake recipe I had read about ages ago. With some research and a few tweaks, I had the makings of a perfectly pretty birthday cake.

First, I decided to replace the chocolate with a pink batter, as I thought this would love more feminine and festive. Then, as a healthier (and easier) alternative to a full buttercream icing, I decided to top the cake with some dollops of light cream cheese and strawberries.

I was quite pleased with how easy it was to make. Basically you just have to put alternating spoonfuls of batter on top of each other. Normally when a recipe is described as being simple, I somehow find a way to get confused, and I really did not believe that such a simple method could create such perfect layers (at least not in my hands). 

My first tentative spoonfuls

But, to my joy and relief, I did achieve an orderly pink and white striped cake! The only problem I had was that my circles started to drift to one side as I poured the batter on!
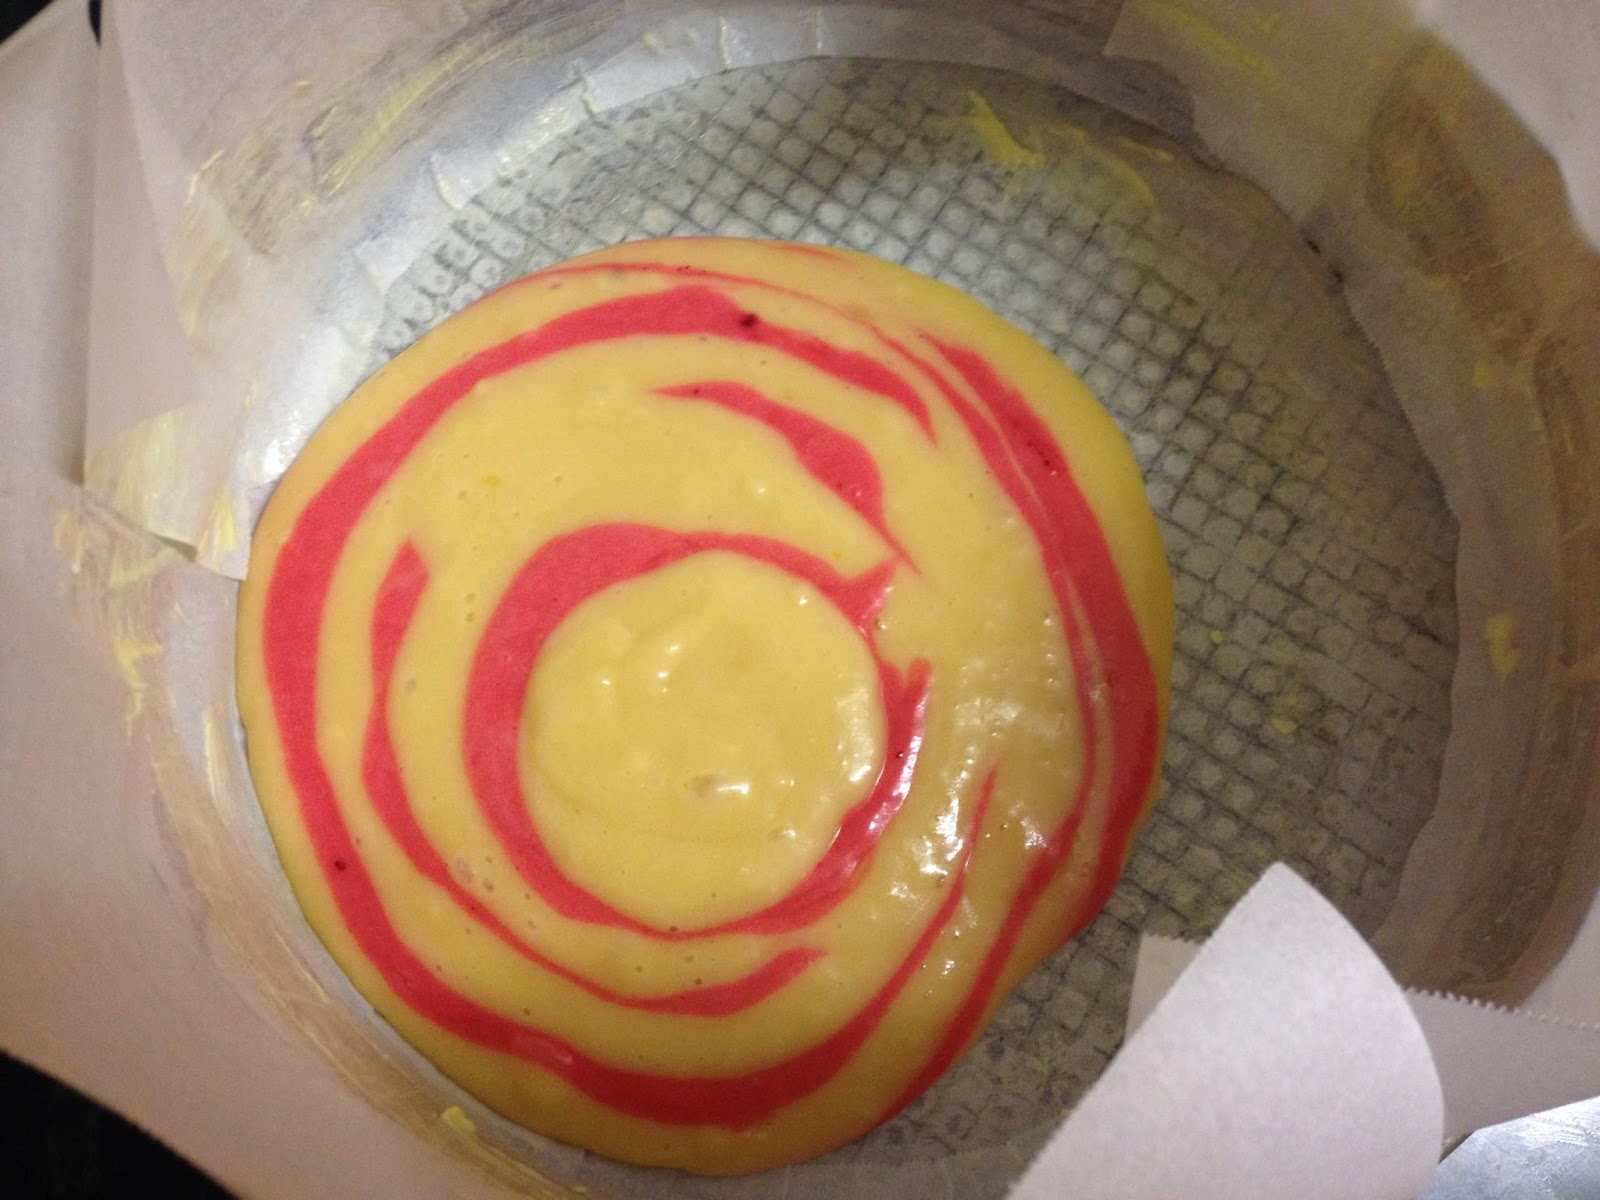

My swirls drifting towards the left...

So what I did was to slowly drift my circles back in the other direction as I poured them on, which seemed to do the trick (although it did mean my cake no longer had a bullseye look, but more of a random swirls look).
Slightly off centre swirls...

Although the cake was simple, it was enjoyed by the whole family, particularly my mother-in-law! Whilst it tasted like a simple butter cake, the swirls of pink seemed to give it a special lift (I'm sure pink is a flavour!). I was also surprised at how nicely the little dollops of cream cheese went with the cake, adding a rich creaminess to the cake. And the batter uses oil instead of butter, again reducing the saturated fat and also making the batter super simple to prepare and work with.


So overall, it really has actually been a good few months - these "life lesson" times always seem to turn out that way, even though it feels like it's all too much at the time. Now I'm looking forward to finishing exams (only one more to go - yay!) and hopefully to sharing more of what I have been up to soon!

Happy Birthday!

Pink Zebra Cake


Adapted from Lorraine Pascale's Crounhing Tiger, Hidden Zebra cake, recipe from My Baba

Serves 8-10

Ingredients
250ml canola (or other flavourless) oil, plus extra for greasing
250g caster sugar
100ml reduced fat milk
4 medium eggs (at room temperature)
A few drops of vanilla extract
A few drops of pink food colouring
325g self-raising flour
1 tsp baking powder
220g extra light Philadelphia spreadable cream cheese
Icing sugar, to taste
Strawberries to decorate
Method:
Preheat the oven to 180°C. Grease the bottom of a 23 cm sandwich tin with a little oil and line with baking paper. Set aside on a large baking sheet.

Put the oil, sugar, milk, eggs and vanilla extract in a large bowl and whisk together to combine.
Pour out 400ml of this mixture  into a medium bowl.
Sift 175g of the self-raising flour into one bowl along with 1/2 teaspoon of the baking powder. Mix well and set aside. This is your vanilla mix.
Sift the remaining 150g of self-raising flour and 1/2 teaspoon of baking powder into another bowl. Add pink food colouring to achieve your desired pinkness and mix everything together well and set aside. This is your pink mix.
Put a tablespoon of the vanilla mix in the middle of the cake tin. Then, using a clean tablespoon, put a blob of the pink  mix in the middle of the vanilla one. Keep doing this, alternating between vanilla and pink, so you form a type of ‘bull’s eye’ or ‘target board’ look. Each time you dollop a blob in, the whole mix will spread out across the base (you may need to adjust where you put your blobs so that you get an even distribution of cake mix along the bottom). By the time you have used up both of the cake mixes, they should have just reached the edge of the tin (the pictures I looked at ended up with even concentric circles, looking like a bullseye, but don't worry if yours is not so geometrically accurate).
Bake in the oven for 35 minutes or until a skewer inserted into the centre comes out clean.
Remove from the oven and cool in the tin for 10 mins. Then remove cake from tin and cool completely on a wire rack. Decorate with strawberries and cream cheese then serve.
Check the cake is cooked by inserting a skewer into the centre. It should come out clean. If not, then return to the oven for another 5 minutes or so until cooked. Once cooked, remove from the oven and allow to cool for a few minutes in the tin. Then carefully remove from the tins and leave to cool completely on a wire rack.
Meanwhile, mix icing sugar into cream cheese to taste. Decorate cake with cream cheese and strawberries, then serve.

Saturday, 26 July 2014

Carrot, orange, and apple muffins


It has been a slightly topsy turvy couple of weeks! Poor Mr Duckie has been working strange hours - New York hours to be precise. New York is 14 hours behind Sydney, which has meant that Mr Duckie had to leave for work in the late afternoon/evening, come home in the early morning, sleep for a bit, wake up to do some more work, have another nap, then head off to work again!

This necessitated more flexible meal and snack plans, in particular, I wanted to give Mr Duckie something healthy and filling to take to work with him whilst he was up at work between "dinner" (now served at afternoon tea time) and "breakfast" (taking place at around morning tea/lunch).

Yes there are two muffins missing at the back - we were too eager to try them!

Luckily, I'd bought some oranges (and neither of us like eating oranges on their own that much), so combined with some other fruits, carrot, chia seeds, and wholemeal flour, I was able to whip up some yummy and goody filled muffins!

To bind the mixture together, I used mashed banana and chia seeds. Grated carrot and apple add some extra moisutre and sweetness (and some extra nutrients!). I also had to add a bit of milk as I felt the mixture was a bit stiff, but of course you could replace this with any non-dairy milk substitute of your choice.


One of the best things about this recipe is that your kitchen will smell great, thanks to all the orange! In fact, when Mr Duckie got home, he immediately said "Have you been cooking? What's in the oven? Something smells lemony!" (haha I suppose lemons and oranges do smell rather similar once cooked!). And then of course he got very excited and hopeful, as he has a nose for baked goods and is always optimistic for sweet treats!

In terms of the taste and texture, the muffins were actually very light and soft. The orange added a real citrus tang to the muffin, and the mixture of the other fruits and carrot helped to add some natural sweetness.


These muffins can be frozen and stored for later when work or school snacks are needed. I think the addition of your choice of dried fruits or nuts would also add an extra taste dimension!

Anyway, luckily the New York hours are over and the both of us are now back on Sydney time! Hooray! Time to sleep it all off and return to normal! :)


Carrot, orange, and apple muffins

Adapted from Coles Recipes & Cooking

Makes 12

Ingredients

1 1/2 cups wholemeal plain flour
1/2 cup cornflour
4 tsp baking powder
1 tsp cinnamon
Pinch of salt
1 large carrot, grated
1 granny smith apple, grated
1 medium banana, mashed
1 orange
1 tbsp chia seeds
1/2 cup canola oil
1/4 cup milk or milk alternative (e.g. soy milk)

1. Preheat oven to 200 degrees (180 fan forced). Line 12 1/3 cup capacity muffin pan with paper cases
2. Mix chia seeds with 1/3 cup water in a small bowl. Set aside for 10 minutes until chia seeds swell up and form a thick gel.
3. In a large bowl, sift in wholemeal flour, cornflour, baking powder, cinnamon and salt. Zest orange rind over the top
4. Remove pith from orange and cut into small pieces. Place orange and any juice that came from cutting up the orange into a small bowl. Add carrot, apple, banana, oil, milk and chia seeds. Stir to combine.
5. Pour wet ingredients into flour mixture and stir gently until just combined.
6. Spoon mixture evenly among prepared muffin pan cases and bake in oven for 20 minutes or until cooked through. Cool in tin for 10 minutes, then remove from tin and enjoy!

Tuesday, 22 July 2014

Birthday dinner at Quay!


This year for my birthday Mr Duckie planned an amazing surprise dinner!

Normally Mr Duckie is not very good at keeping secrets, especially exciting secrets! Normally, every year for my birthday we go to a restaurant at the Overseas Passenger Terminal called Wildfire - it was one of our traditions! However, sadly they closed this year :(

So, poor Mr Duckie had to find an alternative! Leading up to my birthday, I really wasn't expecting too much - Mr Duckie had been very busy at work and I didn't want to make too much fuss. Mr Duckie had also cleverly been priming me - for weeks, he kept lamenting how he was so disorganised and had no plans. He also kept asking me to run through all the best restaurants in Sydney and saying that we should try some of these restaurants!

On the night of my birthday, Mr Duckie suggested a nice walk around Circular Quay and to go to the OPT to see what happened to Wildfire. As we approached where Wildfire used to be, Mr Duckie kept walking. And as we got to the end of the terminal, Mr Duckie started getting quite excited and a sneaky smile appeared on his face.

When we got to the end of the terminal, we saw the signs for Quay. Mr Duckie led me towards the elevator going up to the restaurant, and said "Let's have a look up here, they won't mind!". At which point I figured out that this had been his plan all along! I was so surprised and amazed! Most of all, I was so impressed at how far in advance Mr Duckie had planned (it takes months to get a Saturday night dinner booking at Quay!) and at how well he had been able to keep it a secret! Also extra brownie points to Mr Duckie as I inadvertently threw a spanner in the works - I only told him at the last minute I had a hen's night to attend that very same night, and he managed to change the booking to accomodate a later start!

The dinner was an amazing experience from the very beginning! When we arrived, we were led to the bar area whilst we waited for our table to be ready. We were met with the stunning view of Sydney Harbour, looking out onto the Opera House and the night-time ferries travelling back and forth in the water.


We started off with a delicious mocktail, which was a mixture of ginger, lime, and apple. It was a genius flavour combination and I was so impressed!

Ginger, apple, and lime mocktail
We were then led to our table, which looked right out onto the harbour!

Beetroot and goats cheese
We started with an appetiser of beetroot, rosehip, and goats cheese. I thought I had misheard the description, as at first I couldn't see how there was any beetroot. Then when we dug in, we saw the beetroot hidden underneath! The sweet, earthy beetroot was complemented perfectly by the salty and creamy cheese. Also the cheese looked like it would come as hard shreds, but was in fact soft and melted in the mouth! Also all the details were great - note the pearl handed spoon!


Then came the first course. I had the mud crab congee. It was the fanciest congee I had ever tasted! The egg yolk emulsion tasted like a steamed egg custard like my grandma used to make, only made much more fancy. It reminded me of traditional Cantonese food but with that special twist! Also I apologise for the captions - I didn't take notes on the night so I may not have complete description of the dish.

Congee of Norther Australian mud crab, fresh palm heart, egg yolk emulsion
Mr Duckie had a dish of finely diced raw smoked wagyu. It was served on a lilypad shaped plate which so pretty!The meat was tender and soft, and had a light smoky flavour. The creamy topping was a perfect complement to the meat.

Raw smoked Blackmore wagyu, dory roe, horseradish, soured cream, milk skin
For the second course, I had the XO Sea five sea textures. Again, it reminded me of traditional Cantonese food but fancied up! The dish was a small bowl with lots of beautiful sweet seafood (I think there was octopus, prawns, clams, squid, and scalllop), topped with a salty and flavoursome XO sauce and some crsipy cured pork.

XO Sea, five sea textures
Mr Duckie's second course was the confit pig cheek. this dish was so delicious as there were multiple layers that complemented each other so well - the tender pork, a very soft layer of melty fat, the sweet and soft scallops, and the crunchy toppings. The best part of this was the crispy cracking, which offset the perfectly meltingly soft pig cheek (and who doesn't love crackling!).

Smoked and confit pig cheek, scallop, kombu, koji, shiitake, sesame
For the main course, I had masterstock goose, with kombu and ice plant. The goose came on a very pretty blue plate. Decorating the plate was a crispy leaf, which was almost translucent yet still retained it's natural flavour. The goose itself was very soft and tender, and had a rich meaty flavour. Underneath the goose was a sorrel puree, which added a surprising citrus flavour. Also alongside the goose was some ice plant, which is a very interesting vegetable - it was crunchy and succulent, and covered in fine crystals that looked like ice crystals! Apart from the texture, it also added a delicate saltiness to the dish.

Roasted masterstock goose with kombu and sorrel puree
Mr Duckie had the Angus beef. The beef was so tender and perfectly cooked, with a delicious meaty flavour. The beef was topped with a mixture of crunchy grains of barley, which added both texture and a slightly smoky, nutty flavour. There was also a mixture of funghi on top which added extra earthiness that went very well with the beef.

Grass fed pure Angus beef, black barley, smoked and raw funghi
Now, onto the best course, dessert! Of course, we had to try the most famous snow egg, which really came to fame during Masterchef. Given how much everyone has raved about the snow egg, I was worried that it wouldn't live up to its' reputation. However, I had nothing to fear! In fact, the snow egg more than lived up to its' reputation, and Mr Duckie and I definitely are now a part of the snow egg fan club!

Snow egg
The snow egg dessert is a perfect sphere of the lightest, fluffiest, melt in the mouth meringue. In the centre of the ball is ice cream (I believe ours was guava flavoured). The meringue sits on top of a crunchy, icy granita, and on the bottom of the glass is a pool of strawberry cream. I was amazed at the technique involved - especially with filling the meringue with ice cream. Altogether, the dessert was a perfect mixture of soft, icy, and creamy textures and delicate, elegant flavours.

Inside the snow egg!
We also ordered the chocolate dessert. The dessert came out looking very artistically coated in curls o chocolate. In fact, these curls were nitrogen-frozen chocolate! The freezing processes gave the chocolate a very crisp and actually crunchy texture, which really crackled in the mouth. Underneath the curls was a base of many delicious components, including muscatels, nougat, salted caramel, and almonds, bound together with chocolate. Overall, this was a very decadent dessert!

Chocolate, almond, muscatel, olorose caramel
To finish we ordered some Earl Grey tea and Darjeeling tea (of course we had to have tea!). The tea was served with some delicious truffles,which came in a very cute pumpkin shaped bowl. I believe there were pistachio, salted caramel, crunchy ball coated, and a dark chocolate truffle.

Truffles in a pumpkin bowl!
One of the things that made this dinner so special was the attention was given to every little detail in the experience. I especially loved the unique cutlery and dinnerware that came with each dish, from the pearl handled spoon that came with our appetiser, to the unique bowls and plates for our meals, to the gorgeous tea service.

Look how cute the sugar tongs are, like angels wings!
The friendliness and attentiveness of the staff also added to the experience. In fact, when one waitress found out that it was my birthday, I was given a small box of truffles, packaged in a special Quay box, to take home as a small gift!

Overall, I had a perfect dinner in one of the most elegant and sophisticated restaurants in Sydney. The grandeur of the backdrop enhanced the luxurious feeling of the whole experience. Each course also flowed smoothly from one to the next, so that I felt perfectly satisfied and content at the end of the meal. I feel so lucky to have had such a special dinner! Thank you Mr Duckie :)


Monday, 14 July 2014

Chocolate and salted caramel cupcakes


Recently Mr Duckie and I celebrated our "dating" anniversary (hehe that sounds so daggy!). We have been together for 8 years now! The years have definitely flown by what with all the busy-ness that life is full of, and I am so glad to have had someone special to share all these experiences with :)

Every year for Mr Duckie's anniversary present, I like to follow the "traditional" anniversary gift ideas (e.g. first year is paper, second year is cotton, and so on). I know these are meant to be wedding anniversary gifts, but it still helps me to come up with some meaningful!

So, a quick check of Wikpedia told me that for the 8th year, the traditional US gift is bronze, and the traditional UK gift is salt. This left me pondering for a while. I wasn't sure that a jar of salt was quite an appropriate present, and I wasn't sure I could do much with bronze either!

And then I thought, of course! I should bake something with a bronze and salt theme! And then I realised - yes, salted caramel! It covers both the salt and bronze components (caramel is kind of a bronze colour, right? At least that's what I told myself). And in any case, salted caramel is so tasty, who would be upset with receiving it as a gift?

Please excuse the messy piping, I am definitely still learning my piping skills!

I decided to use a chocolate cupcake as a base for the caramel, as I wanted something that would be strong enough to stand against the sweetness and richness of the caramel. The cupcakes themselves were quite easy to make and had just the right amount of chocolatey-ness.

However, the caramel part turned out to be quite messy! I somehow managed to dribble lots of sticky caramel all over the kitchen bench, down the side of the kitchen drawers, and onto the floor. I think I flung little droplets of caramel into another part of the kitchen as well. And of course, whilst making the icing I managed to cover all the benches in a fine dusting of icing sugar.

I should also warn you to be careful when mixing the caramel - take care not to splash it on yourself as it will burn! I was rather too vigorous whilst stirring the caramel (I got a little scared when I added the cream to the melted sugar as it started fizzling so much!), so I ended up with a couple of sugar burns on my forearm.

But it was all worth it!


Overall, this was a very rich and sweet cupcake. Mr Duckie was very pleased when he saw the cupcakes, and quickly downed one in a few bites. However, much to his dismay, he couldn't manage a second one! I also had a huge sugar rush after eating one of these cupcakes. So do make sure to have a cup of tea on standby to wash all the sugar down!

I also had lots of caramel sauce left over, so I served it on the side (although as I said, this is a very rich cupcake, so go easy with the extra sauce!). I think it would also go nicely on top of some ice-cream, or perhaps to jazz up some plain cakes with!

This is definitely a special occasion only recipe, but I'm sure that whoever you make these for will appreciate you for it :)


Chocolate and salted caramel cupcakes

Makes 12

Ingredients

Chocolate cupcakes
From "Crave" by Maureen McKeon

185g unsalted butter, at room temperature
235g (1 cup) caster sugar
100g dark chocolate, melted
2 large eggs, beaten
185g (1 1/2 cups) plain flour
2 tsp baking powder
1 tbsp cocoa powder
125-185ml (1/2-3/4 cup) milk

Salted caramel sauce
Adapted from Love Swah

1 cup caster sugar
1/2 cup water
3/4 cup thickened cream
1-2 tsp salt (or to taste)

Salted caramel butter cream
Adapted from Love Swah
110 g butter, softened
3 cups icing sugar mixture
1/2 of the salted caramel sauce

For the cupcakes:

1. Preheat the over to 180 degrees. Line a standard muffin tin with paper cases
2. Cream the butter and sugar until pale and fluffy. Beat in the cooled melted chocolate. Add the beaten egg and beat until smooth
3. Sift the flour, baking powder, and cocoa together. Fold the dry ingredients into the chocolate mixture in two additions, alternating with the milk. Use 125ml (1/2 cup) of the milk to start with, adding more if necessary to give a light mixture.
4. Divide the mixture among the paper cases, filling each about three-quarters full. Bake for 18-20 minutes, or until well risen and cooked.
5. Cool for 10 minutes in the tin, then remove and transfer to a wire rack.

For the salted caramel sauce:

1. Combine sugar and water in a heavy bottomed saucepan and stir to dissolve. Heat over a medium heat until bubbling.
2. Bubble mixture for 5-10 minutes without stirring, until a deep golden colour is reached. Keep a close eye on the mixture as you do not want to burn the sugar.
3. Take mixture off the heat and carefully stir in cream (I found using a wooden spoon is best). Be careful as the mixture will bubble when the cream is added. Don't worry too much if some sugar lumps form, this happened to me, and I just ended up taking a big lump of hardened sugar mixture out.
4. Stir in the salt to taste. Pour mixture into a bowl and place into fridge to cool.

For the frosting:

1. Beat butter and icing sugar in a large bowl for about 5 minutes or until light and fluffy.
2. Add caramel sauce and beat to combine. Taste and add more caramel if necessary.

To finish:
1. Pipe icing onto cooled cupcakes. Drizzle over some of the remaining salted caramel sauce to decorate.


Tuesday, 1 July 2014

Apple "pie" breakfast apples


Hi there! Again sorry for the much extended break between posts. There indeed has been a lot that has happened since I last posted. I've just finished my exams (yay!) - I can never seem to get myself well organised enough to do much else when I'm studying, so unfortunately there are no pictures of my cooking during that time. Mr Duckie and I also entered the Cooks River Fun Run, which raised money for Bowel Cancer Australia. We entered the 10km run, which I know probably isn't a very challenging run for most fit people, but it certainly was an achievement for Mr Duckie and I! We battled a very chilly and grey morning, and despite being quite out of shape, we managed to finish the run, although we were the last to cross the finish line ;) It was a really lovely community event and a fun family day out (there were some very fast kids competing in the shorter races!), raised money for a good cause, and most of all I am very proud of Mr Duckie for getting out there and getting active!

This recipe is something that I sort of just made up one Saturday morning during this busy period. Mr Duckie's parents had very kindly given us lots of fruit to take home with us. However, by the end of the week, I still had lots of apples left over! The apples we had were Fuji apples - Mr Duckie loves Fuji apples because they are so sweet, but for some reason, I am not such a fan, even though I generally love most other apple varieties. In fact, I have a weird problem with certain fruits, which is that when I eat them raw, they make me feel quite nauseous - the worst culprit is watermelon, and I don't think I've actually eaten any watermelon since high school.

Anyway, I wasn't up to eating a whole lot of Fuji apples, but I did not want them all to go to waste! So I decided to see how they would taste cooked up with lots of spices and some sultanas.

Much to my pleasure, they tasted amazing! The cooked Fuji apples seemed to take on an almost jelly like consistency once cooked. There was a bit of tanginess from the lemon juice, and a delicious fragrance from the cinnamon.

I served the apples with some toasted and buttered baguette (because I also needed to use up the baguettte!). Mr Duckie was very pleased with his breakfast, and decided that the combination of the sweet apples and crunchy bread tasted almost like eating apple pie for breakfast!

I think this would also be a great dessert, replacing the bread with some sweet biscuits and maybe some ice cream ;) And this is a relatively healthy recipe, so you can eat apple pie for breakfast without feeling too guilty about it!

Apple "pie" breakfast apples

Serves 2

Ingredients

4 Fuji apples
Juice of half a small lemon
Sprinkle of cinnamon
3 tbsp raw sugar
Sprinkling of sultanas (I used about 2 tbsp, but add as many or few as you please!)

Combine all ingredients in a small saucepan. Add a splash of water, and cook on a medium heat for about 10 minutes until apples are soft and cooked.

There's no real recipe for this so you can change the amount of sugar and spice that you add, use your own favourite apple variety, and cook for a shorter time if you prefer your apples a bit more crunchy! Feel free to play around with this recipe to suit your own taste!


Saturday, 24 May 2014

Saucy microwave puddings


I’m so sorry it’s been such a long time since I last posted! Since that time things have been quite crazy – I managed to lose my building security pass, break my iron (I dropped it on the ground), get sick, look after Mr Duckie whilst he was sick, and make sure I had all my assignments ready to hand in at uni. After all of this, my brain just decided to give up. In fact, I spent most of last weekend asleep or doing not much at all whilst trying to recover. Hopefully things will calm down a bit now, and I can get my head back in order again.

During these busy weeks, I’ve been heavily reliant on meals that are quick and easy, whilst still giving the required nutrients. This microwave pudding is simple, quick, and requires very little fuss. It isn’t exactly the most healthy, but it does help to lift the spirits (which is undoubtedly another important role of food!). When Mr Duckie was ill and in need of something sweet and comforting, and I didn’t have much time to spare, this was my go-to dessert.


Apart from its ease, the best thing about this recipe is that it is so versatile. I’ve provided both a vanilla and a chocolate recipe here, depending on what you feel like. I used the vanilla cake base to make a saucy lemon pudding, just by adding some store-bought lemon curd to the bottom of the bowl! This gave a bubbling lemon sauce underneath the vanilla sponge top (it got quite hot, so be careful when eating this!). I’ve also made this into a jam pudding by dolloping some jam into the bottom (using my favourite cherry jam). This was also delicious and I think I even liked the jam version better than the lemon!


I used a very special-looking vanilla bean paste for the vanilla sponge. The paste contains lots of vanilla seeds in it, and a spoonful of this paste is equivalent to a whole vanilla bean! The pudding had lots of lovely tiny black flecks throughout thanks to the vanilla paste.


For the chocolate version, I added big chunks of chocolate in the middle to give it a melty chocolate centre – I ended up with little pools of chocolate sauce throughout the pudding! I would definitely experiment with different types of chocolate as well – maybe some caramel chocolate to add some caramel sauciness to the centre ;)


This pudding is egg-free and can easily be made dairy free by using a milk alternative and dairy-free chocolate. Also note that the serving is big enough for two or even three people, so you’ll have plenty to share with your special someone. Feel free to play around with your favourite additions and jam flavours to make this pudding your own!


Mr Duckie polished off his pudding!

Saucy lemon pudding

Adapted from the Stir

Serves 2

Ingredients

2 tbsp lemon curd or your favourite jam
4 tbsp plain flour
2 tbsp sugar
½ tsp baking powder
A pinch of salt
1 tsp vanilla bean paste
4 tbsp milk
2 tbsp oil

1. Place lemon curd or jam into the bottom of a bowl.


2. In another bowl, combine dry ingredients and stir well.


3. Make a well in the centre and add in milk, oil and vanilla paste (add a little extra milk if you feel the mixture is too stiff - it should have a dolloping consistency like regular cake batter). Stir well to combine.


4. Spoon over the lemon curd/jam. Microwave for 3 minutes, stopping every minute to check whether the cake is cooked (do not overcook cake otherwise it can be dry).


5. Serve straight from the mug!


Chocolate microwave pudding

Adapted from allrecipes.com

Serves 2

Ingredients

4 tbsp plain flour
2 tbsp sugar
2 tbsp cocoa
½ tsp baking powder
1 pinch of salt
4 tbsp milk
3 tbsp canola oil
1 tsp vanilla extract
50 g chocolate chunks (I used 8 squares/2 rows of chocolate from a Cadbury Old Gold block)

1. Combine dry ingredients in a bowl and mix well.


2. Make a well in the centre. Pour in milk, oil and vanilla extract and stir to combine (add a spoonful of extra milk and oil if you prefer a fudgier texture).


3. Push chocolate chunks into the centre of the pudding. Microwave for 1 minute. If cake is not yet cooked, microwave for another 30 seconds.


4. Serve straight from the mug, with a scoop of your favourite ice cream!